
Customising buttons in Analysis and sharing profiles? Here’s how in just 10 minutes!

If you know Analysis for Microsoft Office Excel, you also know the buttons. Particularly those that can be customised. In 10 minutes, you will have customised your workbook and shared the profile for further editing. And here’s how.
Customising buttons in Analysis for Microsoft Excel? For most BI enthusiasts among us, this is certainly old news. But finding all the information in one place instead of clicking through various sources? In seven simple steps, all the information on how standard Analysis buttons can be hidden and replaced with a few selected ones. But only for a specific workbook and not for all. And so that multiple administrators can change buttons if necessary. Just follow this guide and your workbook will be customised in 10 minutes. Just the way you want it.
There are two variants:
- the buttons are already there: import profile file, then customise buttons, return profile file to server for access by other colleagues
- new buttons (“everything new”): create a new profile, then place profile file on the server for future changes
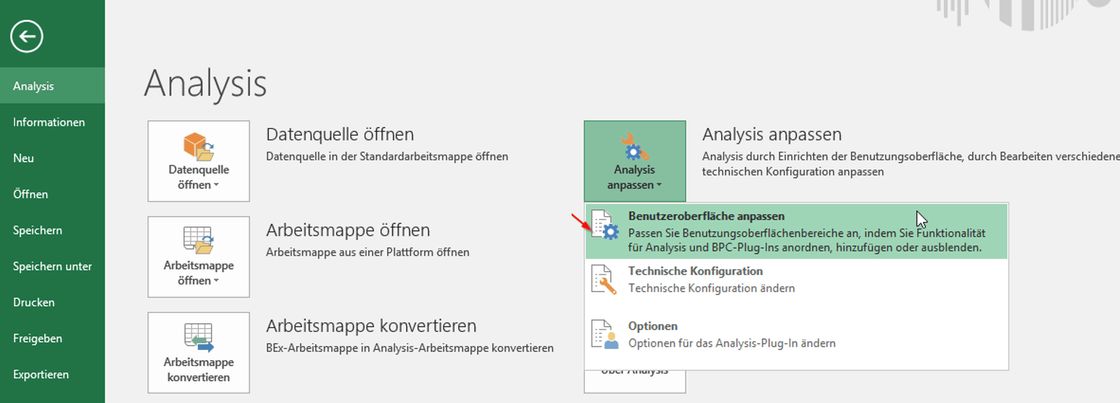
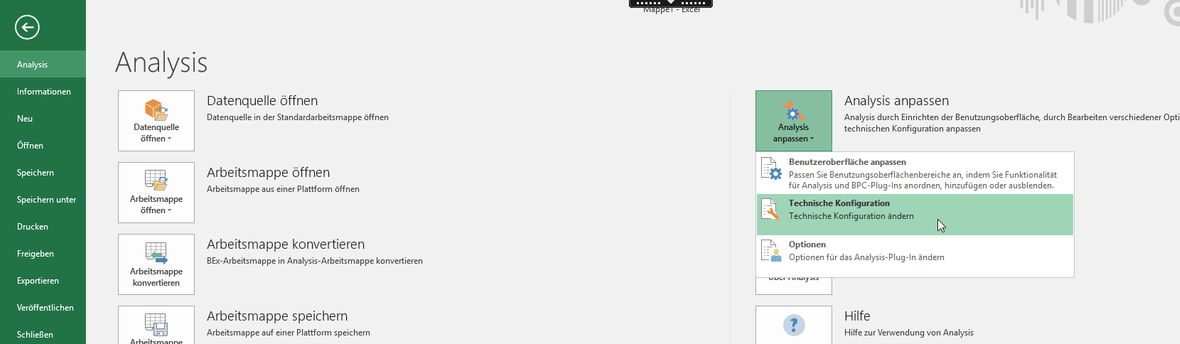
Step 1: Prepare XML file for customisation. The profile that contains the user interface and thus the buttons is stored in an XML file. If you want to create entirely new buttons, you can confidently proceed to step 2.#_msocom_2 #_msocom_2#_msocom_3If the buttons already exist and you want to customise them, you need to retrieve the XML file locally in your Analysis. The question is: Where is the file stored locally? For this, switch to the 'Technical Configuration'.
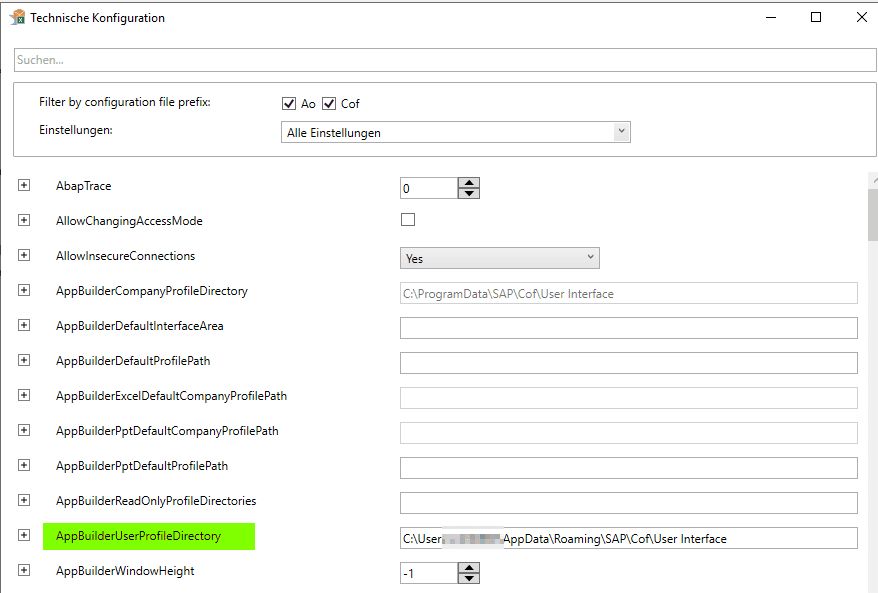
Look for 'AppBuilderUserProfileDirectory' there. Here you will find the path where the existing profile must be located for access or where the newly created one can be found.
Once you have finished customising the buttons, please copy the file to a location (File Server, Share) that your colleagues can also access. If there is already a profile that needs to be changed, please copy it into your user directory, which we just identified.
Step 2: Save workbooks locally Existing workbook(s) that should receive the new profile must now be saved locally, not on the BO server or in BW! Close these and Analysis after saving.
Step 3: Open an empty workbook Then reopen Analysis and start with an empty workbook. This must not contain any queries according to SAP guidelines. Also, ensure that no other workbook is open.
Step 4: Customise the user interface Select 'Customise User Interface' in the customisation options.
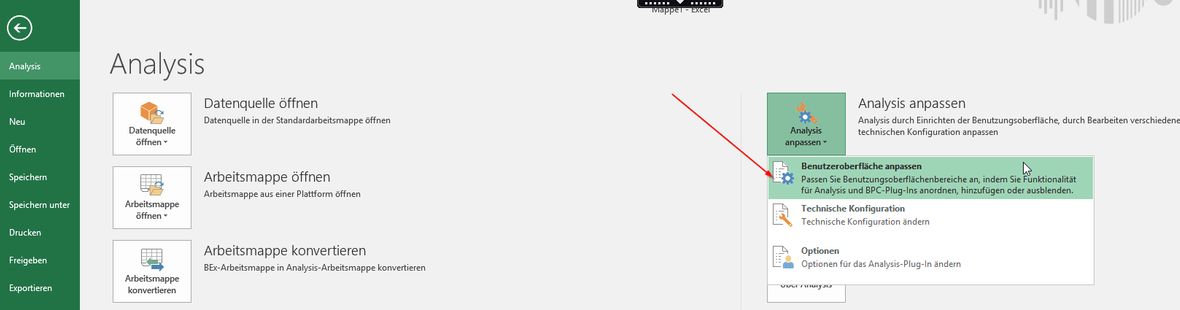
The view of the standard profile will then open. While you cannot change this at this point, you can create a new profile by clicking on the save icon ('Save As').
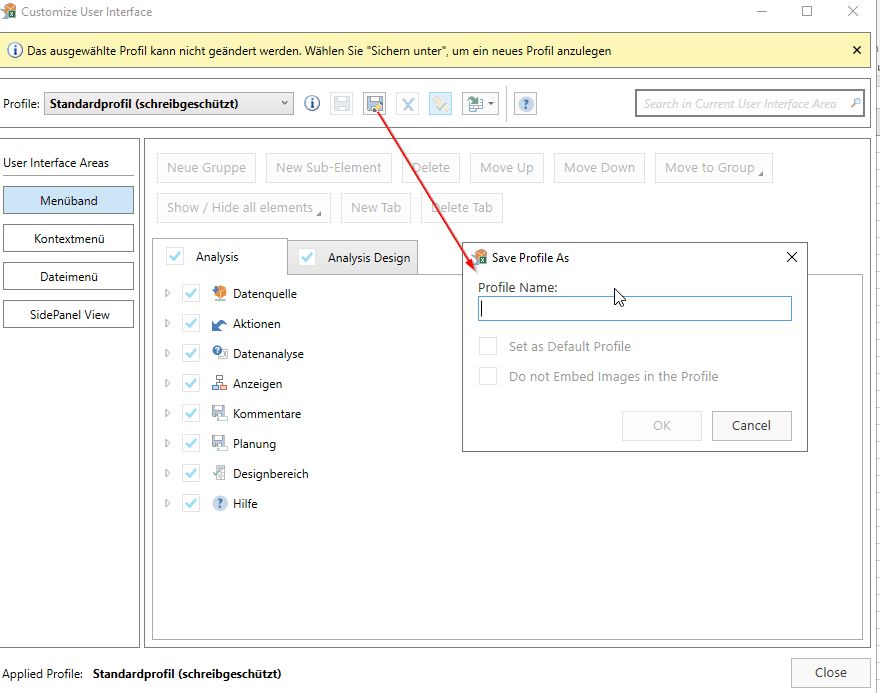
If you want to change an existing profile, please select it from the dropdown on the upper left side and click on it. Make the desired changes to the profile and save them. Note: It may happen that the window is displayed in the background. If so, open the task manager and use the 'Bring to Front' function to access the corresponding editing window.
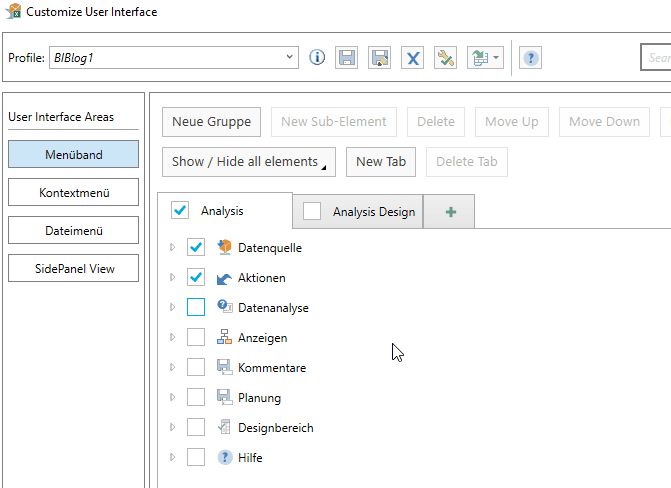
If you want to know exactly what is possible here, please follow this link to the SAP documentation.
Step 5: Embed profile
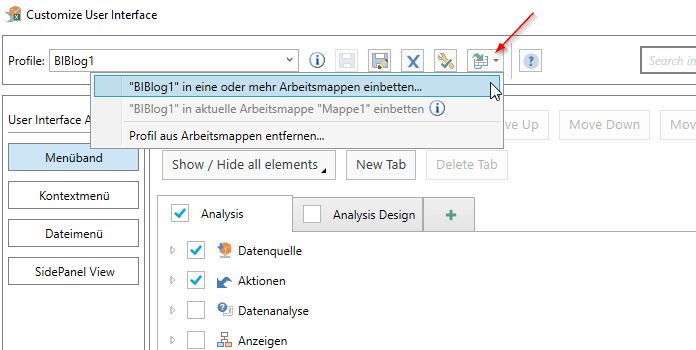
By clicking on the Excel icon in the top menu bar, profiles can be embedded in workbooks. Select the local workbook(s) and confirm this. You will receive a message that this has been implemented and the profile has been successfully embedded in the corresponding workbook. Thus, only the new profile (in our example, the profile 'BIBLog1') applies to this. When the workbook is opened, this profile will be immediately pulled upon opening.
Step 6: Save workbook in BW Once you have customised the local workbook, please save it again in BW or BO, or replace the 'Old' with the new one.
Step 7: Save XML file Finally, also place your modified profile, i.e., the XML file, back on the drive!
Done. So? Did I promise too much? I am sure you kept to the 10 minutes well. And if not: Practice makes perfect! By the way: The procedure described above works from Analysis 2.6.
If you are eager for more, just check the SAP documentation on customising Analysis for more tips & tricks that will help you get even more out of your Analysis!


